The first time I ever saw the triangle choke in action was in 1994, during the last match of UFC 4.
Royce Gracie had just squared off against Dan Severn, a seemingly unstoppable wrestler with a huge weight advantage. I remember thinking, ‘There’s just no possible way that Royce is gonna win this one.’
The fight went to the ground quickly, and after 15 minutes of getting manhandled Royce found a way to set up and apply the triangle choke. He adjusted it and the hairy scary behemoth wrestler tapped out.
Right then I became an instant fan of the triangle choke!
Now, years later, the triangle choke is no longer a closely-guarded secret of the Gracie family. Instead it’s become one of the signature moves of BJJ (think of how many schools use it in their advertising or on their logo). And the triangle choke continues to be responsible for a huge number of submissions in Brazilian Jiu-jitsu, no-gi grappling, and MMA.
But a lot of people still have problems with this submission initially. The most common complaint being “My legs are just to short for triangle chokes.”
Now it’s true that leg length is a factor. In general, long legs make the triangle choke easier to apply. Royce, for example, is built for the triangle choke: tall, lean, lanky, with long legs.
In addition to leg length, leg thickness also plays a role. Thick, muscular legs can be a bit of a liability in the triangle choke because the space inside the triangle formed by your legs will be smaller. The flip side, though, is that once someone with muscular legs gets the triangle choke locked on then, oh boy can they generate pressure. Generally the recipient of a choke like this feels like their melon is about to explode!
Now there are certain adjustments, modifications, and variations that can save the day and allow you to use the triangle choke despite having shorter, stouter legs.
First of all, keep in mind that the triangle choke is one of those techniques that you have to develop a feel for. It’s not like the armbar which most people can make work on their first day in class. With the triangle choke it can take a while to learn all the subtle adjustments and positioning details to make it effective.
One such adjustment is to turn sideways when you apply this choke.
Yes, some people can apply the triangle directly in line with their opponents, but if you’re going to do this (i.e. stay square) then you really do need longer legs.
Turning sideways gives your shorter legs a bit more room to get into position. And also makes it a lot harder for him to escape the triangle.
I’ll explain about turning sideways in a sec, but first let’s go over some terminology. When you’re triangle choking someone you have their head and one arm trapped between your legs.
The arm that’s between your legs is his ‘trapped arm’.
The arm that’s NOT between your legs is his ‘free arm.’
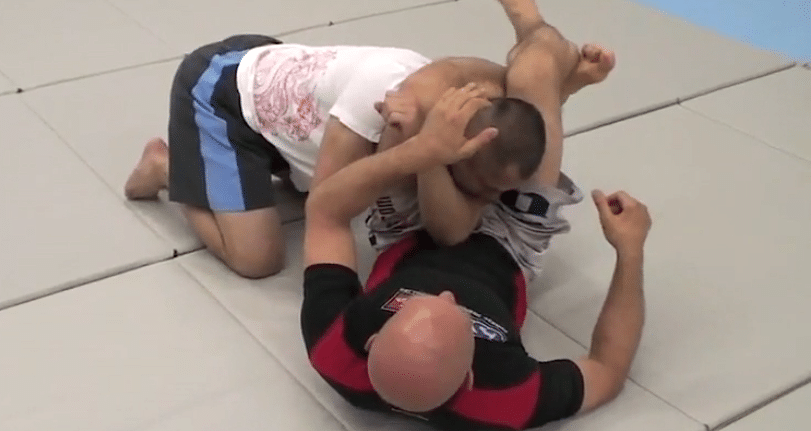
When you’re turning sideways bring your head towards his free arm and away from his trapped arm. Ideally you’re bringing your head all the way to his knee. In the picture below I’ve got my training partner’s left arm trapped, and I’m in the process of turning my body towards his free right arm.
At this point a great way to finish is to underhook his free arm with one arm, and then squeeze, squeeze, squeeze to apply the submission.
Along with controlling the head and breaking down his opponent’s posture, this rotation of the body was something that Elliott Bayev REALLY emphasized to during our sessions together. Turning sideways is one of the easiest fixes for a faulty triangle choke, so make sure you give it a try and see if it helps.
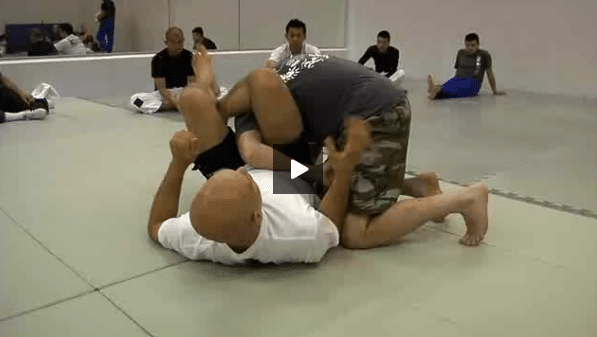
Here’s Elliott Bayev going over the details of the triangle choke…
The next tip I first learned from Oleg Taktarov, who doesn’t have particularly long legs either (sorry Oleg, but it’s the truth). Make sure that your triangle choke is high on his body, with your leg across his neck, not his upper back.
Let’s say that you’re applying the triangle choke on me, and that you have my head and left arm trapped between your legs just like in the picture above.
If you can see my entire left shoulder popping out between your legs then it’s going to be a LOT harder to finish the choke. My shoulder will be blocking the power of your choke, and if your legs are on the short side then there’s also going to be tremendous pressure on your ankle.
Usually if you can see the shoulder of your opponent’s trapped arm then it’s a sign that your legs are too low on your opponent’s body. In the example above your left calf might be across my upper back, rather than on the back of my neck.
Think of putting your calf across the back of the neck, exactly where an executioner’s axe would strike. Done this way your legs will be in a much better position. Your opponent’s trapped shoulder will be mostly obscured – and not seeing your opponent’s shoulder tells you that your legs are high enough on the body.
Another option: if the regular BJJ triangle choke is just too difficult for you to use on a specific opponent then consider giving the ‘side triangle choke’ a try. You can’t use the side triangle from the guard – not easily anyway – but I’ve found that it’s much easier apply side triangle chokes on larger opponents than regular straight-on triangles.
I break down the side triangle choke for you at about the 2:43 mark of the following youtube video:
To view the same video of Five Triangle Chokes You Must Know on YouTube, click here!
(For more information about the side-triangle choke also check out the fourth video on this page about Judo and BJJ cross-training)
Now even if your legs are super-short, and your opponent has the neck and shoulders of a roided NFL lineman, and you can’t even cross your ankles behind his back, then there’s STILL hope for you…
Let’s say that your long-limbed and uber flexible BJJ teacher shows you a super-cool upside-down, flying, leaping, 12 step entry to the triangle choke. You tell yourself, “Man, that entry would really fit my game, but I can only finish the triangle on about 25% of the people with because my legs are so short…”
No problem!
You should still learn and practice that cool entry; don’t throw the baby out with the bathwater…
You see, every single triangle choke entry can be converted into an omplata armlock, or an omoplata sweep.
Think about the last entry or setup for the triangle choke that you learned or drilled. Now, at the last moment, instead of locking your legs in the classic triangle choke position, move his arm to the outside of your hip (sometimes this involves bringing your own arm up underneath his and punching it to the ceiling).
Then, instead of moving your head towards the side of his free arm, you move your head the OTHER way. Towards his trapped arm, with the goal of bringing your head to his knee. Voila! The omoplata.
This is easier to demonstrate than it is to talk about. Trust me, every triangle choke entry can be converted into an omoplata entry. Play around with this on your own a bit and you’ll see what I mean.
Click here for a good introduction to the omoplata, and to see some of the changes I’ve made to this attack in recent years. Yes, this is a teaser video for one of my products, but you can still steal lots of good omoplata tips from it even if you never get the product itself:
Finally, if you have your own solutions for applying triangle chokes with little hobbit-like legs, or if you just can’t get them (or the omoplata) to work, I’d love to hear about it. Post your thoughts in the comments below!
Happy triangling!


