In this new video my friend, BJJ black belt and world champion Brandon ‘Wolverine’ Mullins shows how to set up and finish his favourite submission from the half guard.
As you watch it pay attention not only to the details of the movement, but it’s really the underlying pattern of bridging and shrimping that powers the whole technique.
Breaking a technique down into its fundamental components is where Brandon really shines. Check it out either in this video, or the photos and descriptions below that.
That the bridge and shrimp are essential to the triangle choke shouldn’t be surprising. How many times have you heard, “Hip movement is the key to jiu-jitsu”?
Well, the two fundamental ways to move the hips in jiu-jitsu are: 1) bridging, and 2) shrimping. So it shouldn’t be surprising that bridging and shrimping show up again and again, even in advanced techniques.
(Of course these aren’t the only kind of fundamental movements. For example, other fundamentals include four types of technical standup and three kinds of rolling. But the technique in today’s email just focuses on the bridge and shrimp.)
Let’s see what Brandon Mullin’s number one half guard submission looks like, with a special focus on the actions of these fundamental bridging and shrimping movements.
HALF GUARD STARTING POSITION
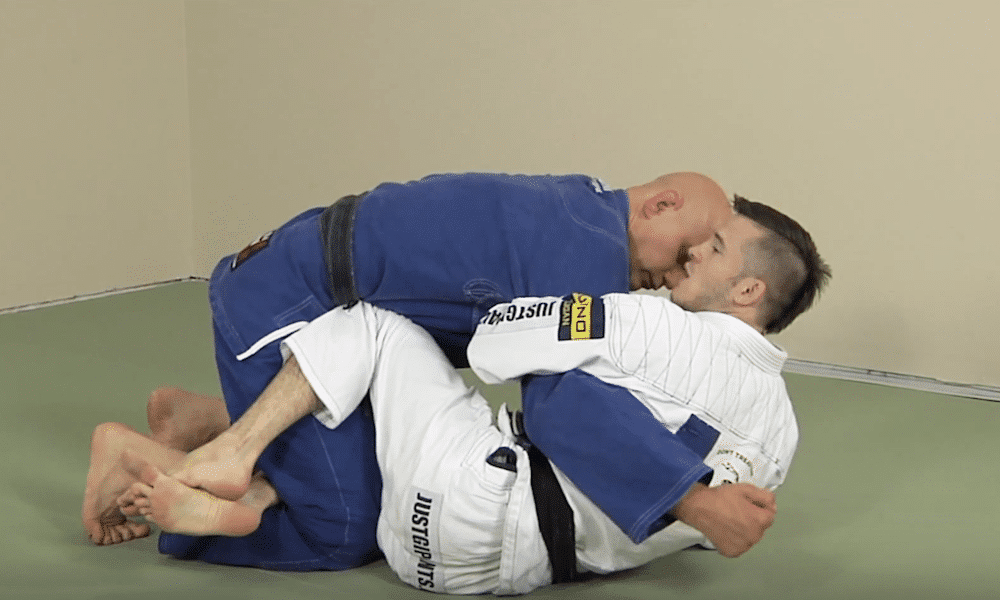
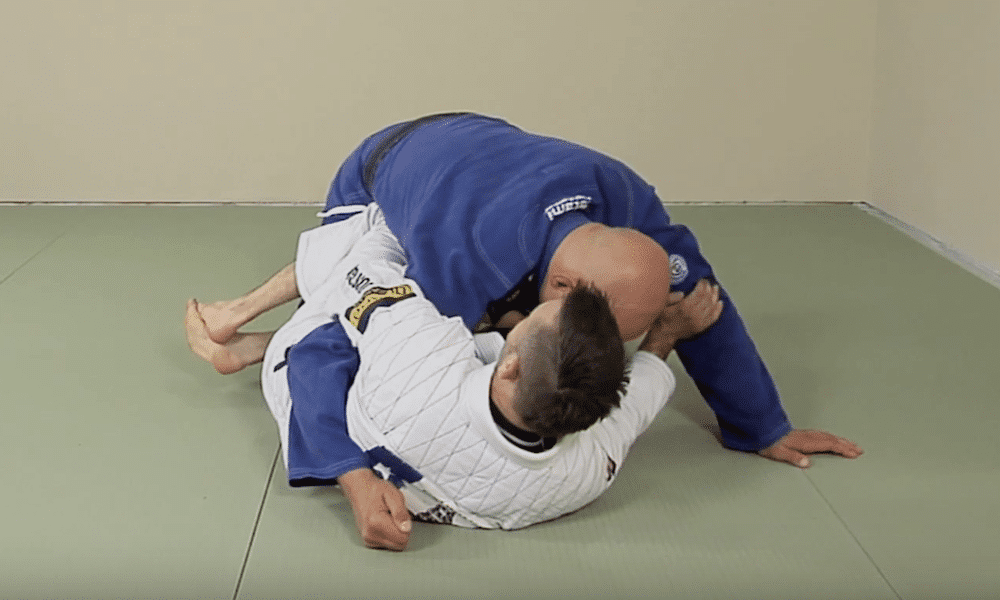
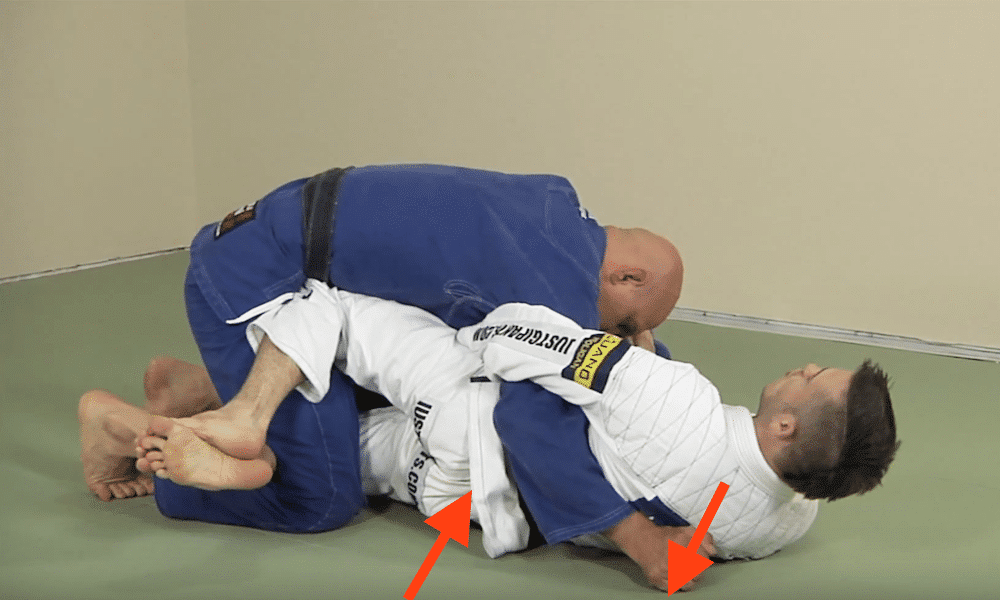
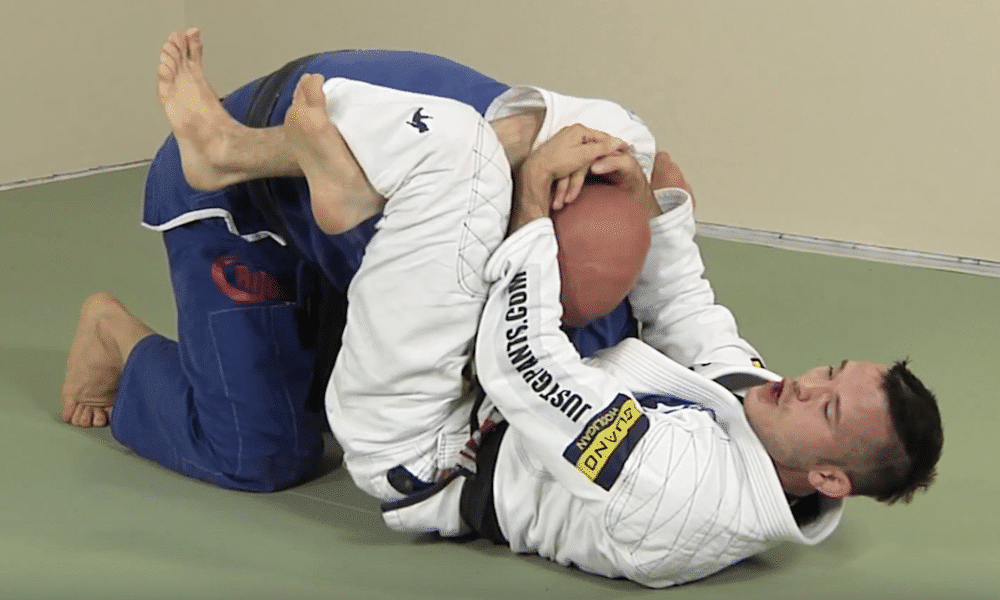
Start in half guard, hooking your opponent’s right leg with your own right leg and the tip of your left knee on his hip. Start with your toes crossed IF you can do it (to stop him from blasting out of the position).
After your knee is in position overhook his right arm with your left arm. Grab his far collar if you can. Use your other arm (your right) to block his left arm to prevent the crossface
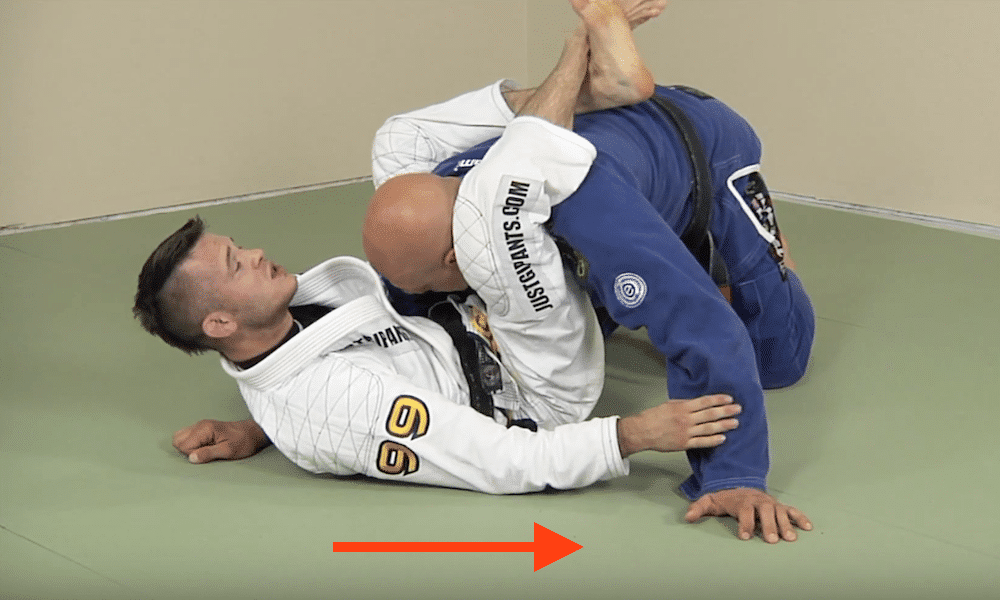
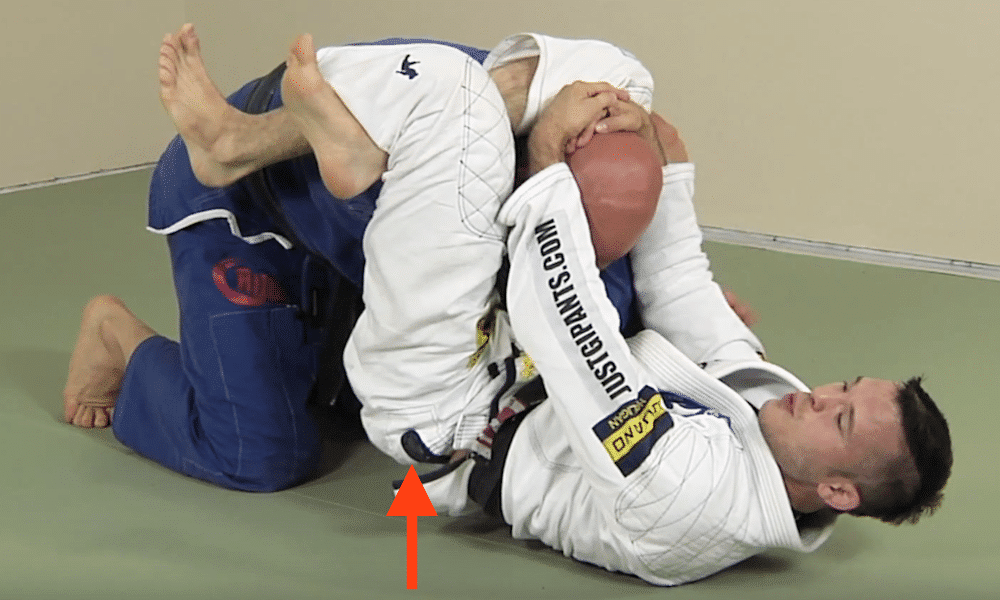
STEP 1: BRIDGE TO CREATE SPACE FROM HALF GUARD
Extend your hips in a sideways bridging motion to stretch him away and create space.
The space you just created then allows you to pull your bottom (right) leg out and get your foot onto his left hip while still keeping your top (left) knee in place, keeping him at a distance.
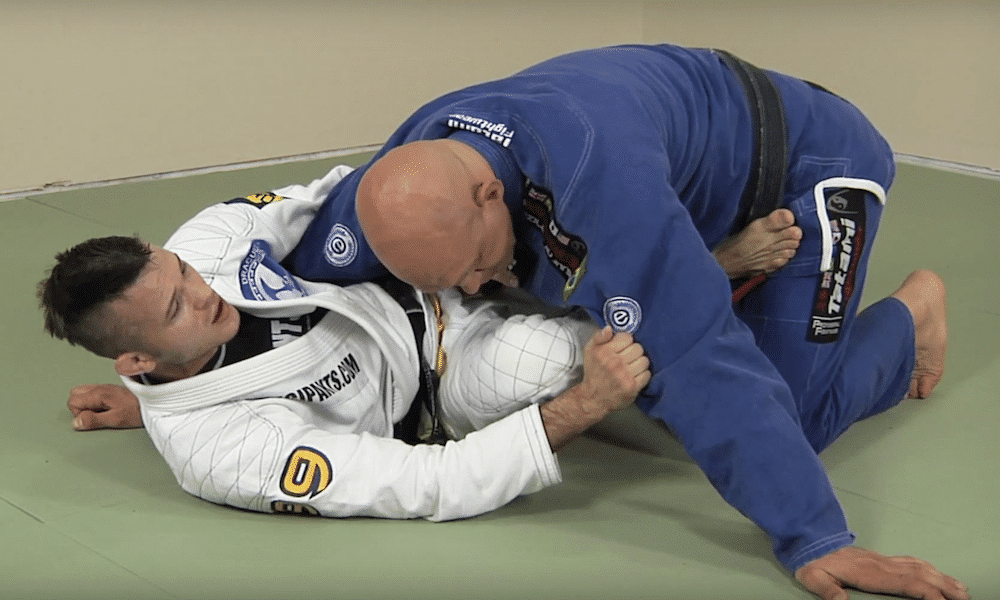
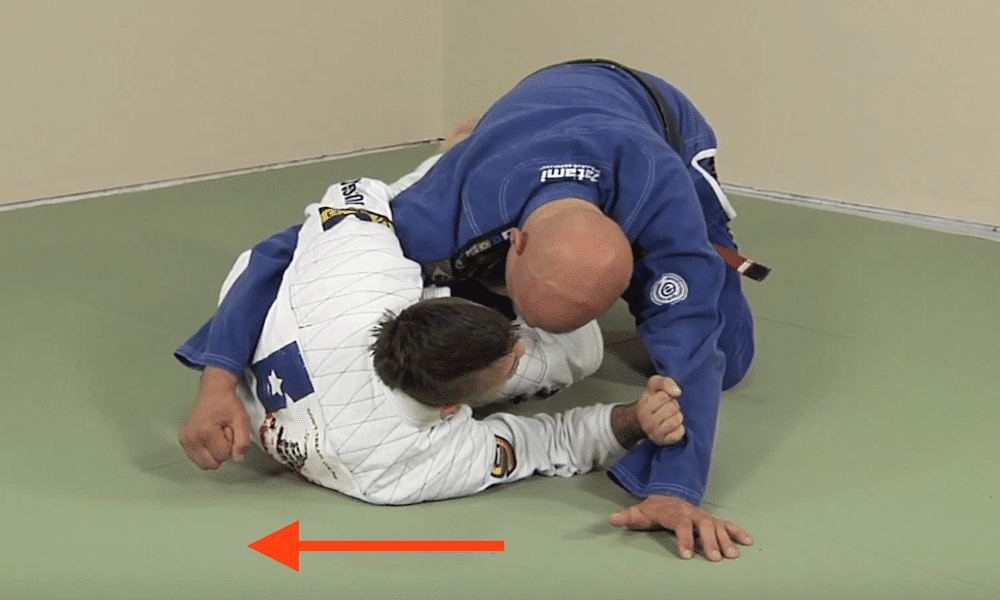
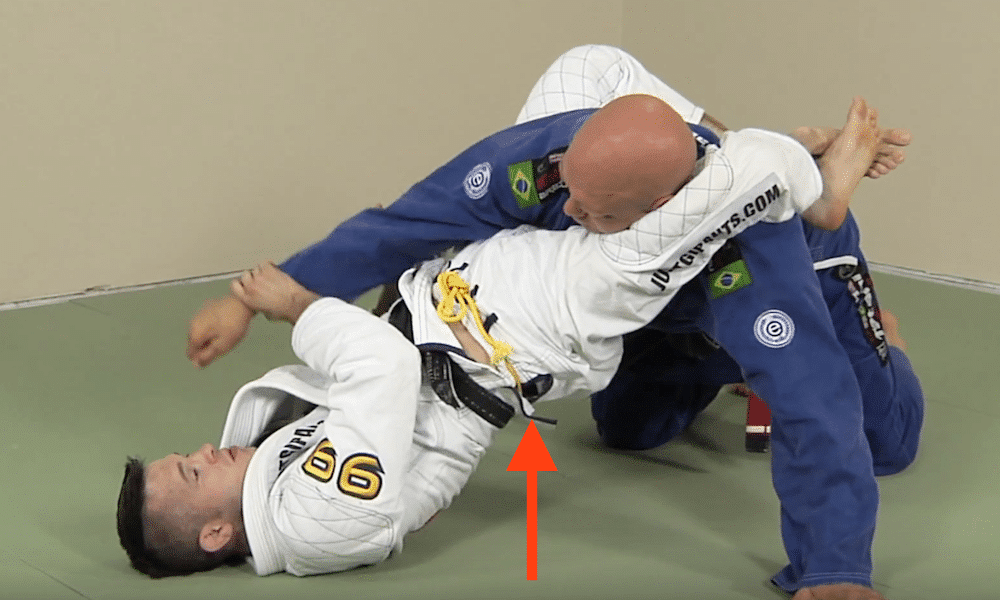
STEP 2: SHRIMP TO GET YOUR LEGS INTO THE LOOSE TRIANGLE CHOKE POSITION
Move your hips out, to your left, using the shrimping motion.
This creates enough room to throw your left leg over his upper back…
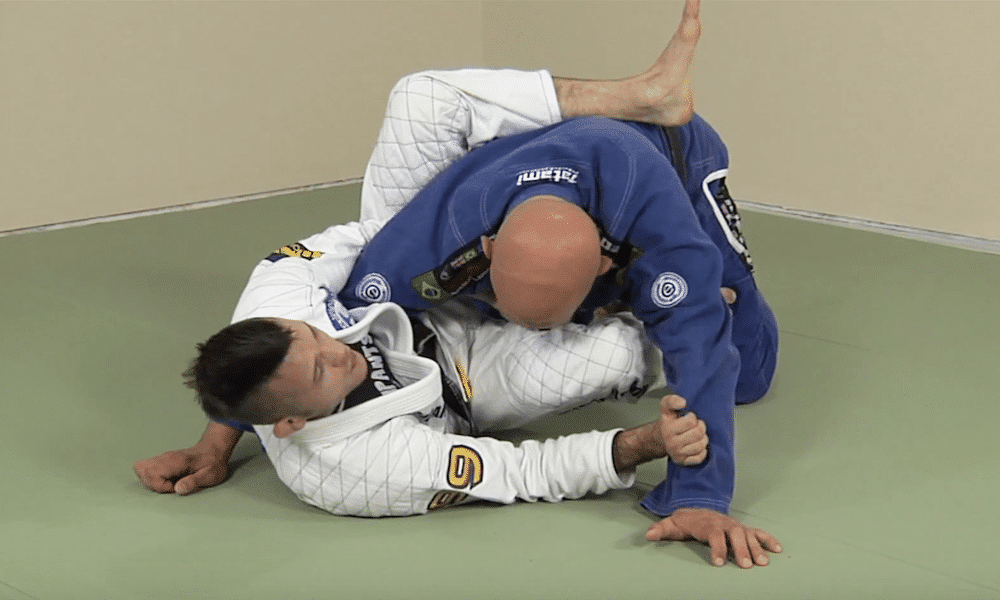
Then extract your right leg and throw that over his shoulder while shrimping back underneath your opponent.
Your ankles should end up crossed (right over left) in a loose, pseudo-triangle position to temporarily immobilise your opponent. Don’t worry, you’ll adjust the triangle position soon enough.
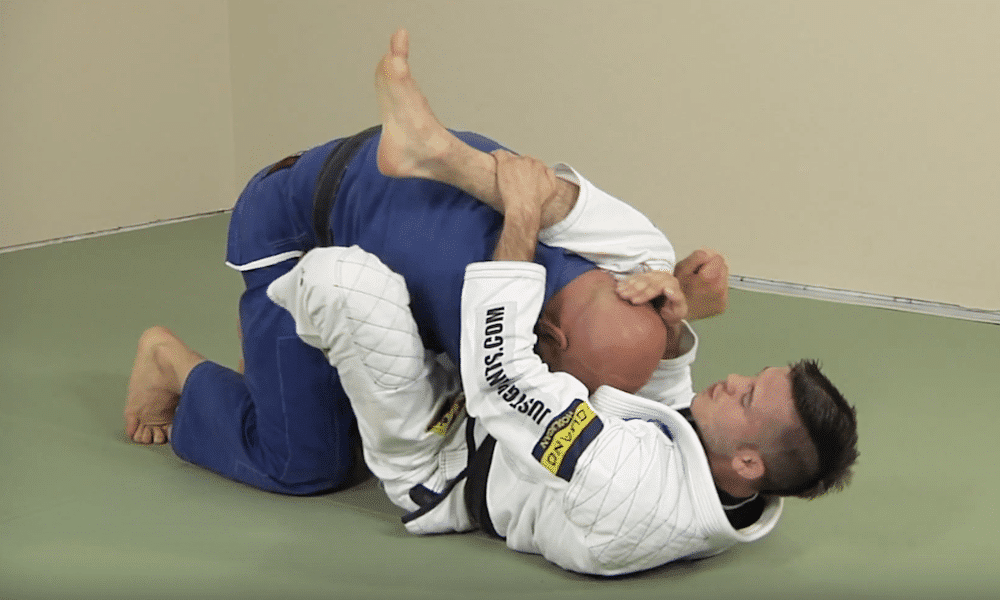
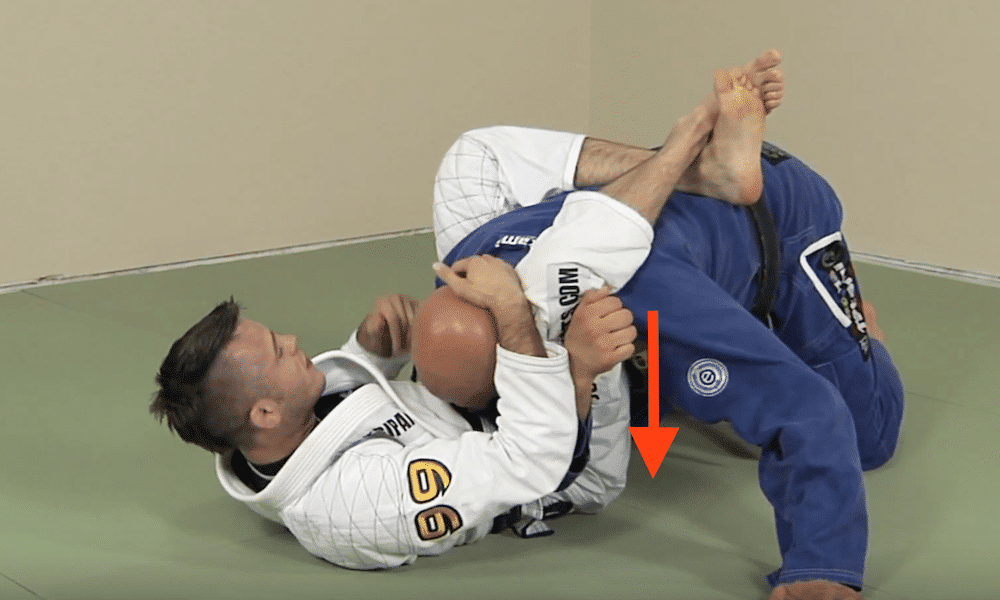
STEP 3: BRIDGE TO ADJUST THE TRIANGLE CHOKE
His arm is still on the wrong side of your body. To fix this bridge your hips up using his body as an anchor (not the floor).
This elevated position allows you to move his trapped right arm across your body into the classic arm position, after which you can drop your hips down again.
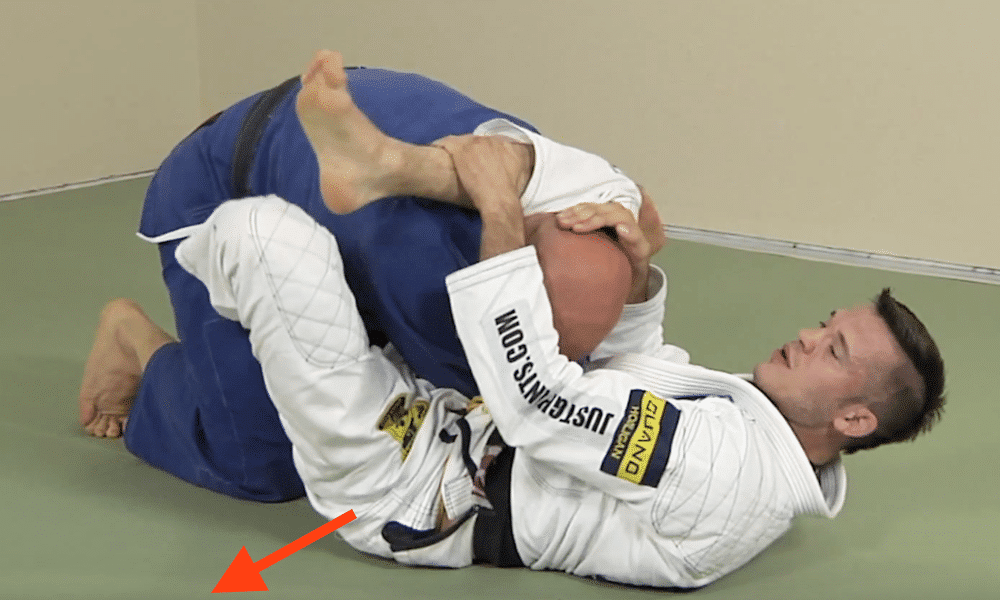
STEP 4: SHRIMP TO CONTINUE ADJUSTING THE TRIANGLE CHOKE
Controlling his head with your right arm grip your own right ankle with your left hand.
Put your left foot on his right hip and shrimp your hips out to the side. This creates the correct angle for the submission and greatly tightens the choking effect on your opponent (sometimes you can even choke him out from here, without actually triangling your legs.
Then triangle your legs, right instep behind the left knee.
STEP 5: BRIDGE TO FINISH THE TRIANGLE CHOKE FROM HALF GUARD
Control his head with both hands and bridge your hips upward to finish the choke and get the submission
But even if you’re at work right now and Youtube is blocked by the corporate firewall, the real takehome here is the importance of the two fundamental movements front and center in this technique.
Sure, there are are a lot of little details and adjustments that you need to know, but it’s WAY more important to understand the fundamental movements instead.
Fundamentally the triangle choke from half guard is 1) bridge, 2) shrimp, 3) bridge, 4) shrimp, 5) bridge.
If you understand the big picture (e.g. “I need to lift my hips so that I can move his arm across in Step 3”) then it makes the exact grips you use to accomplish that goal a little less important.
Besides, in the heat of battle you may need to improvise and your foot won’t go into the exact right spot…
And you might not be able to grab the precisely prescribed bit of cloth…
But it’s the fundamental movements that are the real driving force behind the technique. So even if you need to grip in a slightly different place or end up with your foot on his thigh instead of his hip it’s OK: as long as the fundamentals are solid you can probably find a way to finish the technique!
Isn’t it amazing that the bridge and the shrimp, two movements you likely learned in your first week of BJJ, are still the movements used by a BJJ world champion to apply his high level submissions?
Have fun with the fundamentals!
P.S. This technique shows how the fundamental movements aren’t just used for fundamental techniques, but at all levels of jiu-jitsu
The Advanced BJJ Fundamentals mobile app covers 12 fundamental movements, and then dives deep into any different applications for these movements. After watching this material you should be able to build your jiu-jitsu game on a much more solid foundation.
And have an easier, more fun time on the mats too.
This mobile app is available for Apple or Android devices. Click one of the links below to check out the app in one of the relevant stores:


